Continues from Part 1
Ok, photons did their part. As far as we can see from the reference image, the only light sources are the "sun" and the skylight. Let's worry about the skylight later - once found a good setup for the bounced sun light, skylight will be a snap.
Since I'm happy with the photon map solution, I'm gonna reuse it, to avoid the calculation for every next rendering.
For those who can't live without rendertimes, this will "remove" a grand total of 33s from the rendering time.
Let's put regathering in the equation. As you probably already know, in this way we'll use QMC to render the scene - with the help of the photon map, that will tell Brazil where to shoot.
Notice that, at photon map setup time, we used "precompute" - that speeds up a lot regathering. Low precompute values help keeping the quality up.
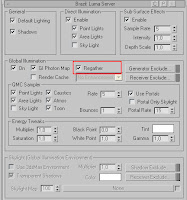 Just turn on "regatehring" and hit render.
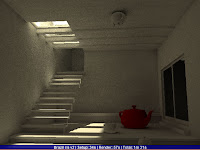
Hmmm, nice old-style gi look. Let's try to bump up QMC samples to 15 and render again:
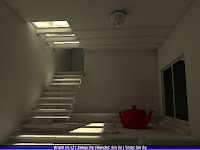
Nevermind about the noise: when we'll be ready for the final rendering, antialiasing will take care of most of it, and we already know also that more qmc samples=more smoothness, so it will be easy to reach the wanted quality.Much smoother, but with a nice 5x render time - ooops.
Time to ask some help to the render cache panel - we'll try to lower the render time as possible, while keeping the quality.
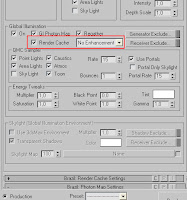 Just enable it and hit render.
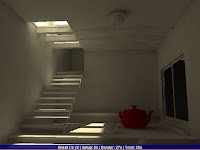
Fast as hell, but quality is much worse. Let's tweak the Render Cache settings:
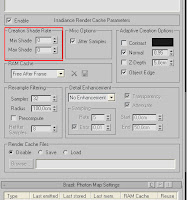 I only raised the min/max sample shade rate to 0/0.
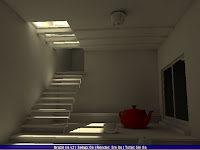
Quality seems to be back - notice how the usage of render cache smoothed up a few the noise. Rendertime is similar to the one without render cahce, by the way - so how would render cache help?
Well, analyzing further the render time (go check your B2 Console), most of those 5m8s are for the render cache solution - 5 mins on my workstation. This means that, once calculated the render cache map, the rendering will be fast even at AA values of 1/2 or more. Here's the result obtained at AA values of 1/2:
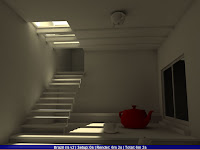 Nice, ain't it? A bunch of seconds more, but antialiased! Try it without the render cache enabled, and see on your own the difference...
A few splotching is visible - better add some QMC samples. Let's push the qmc sampler rate to 25.
Time for the Skylight. Enable the skylight in Luma server, in both Direct Illumination and QMC Sampler:
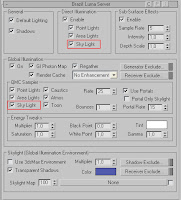
Seems that my initial Skylight color RGB values were totally wrong, sorry for that. I went with 210/235/255 instead, and it came out much better.
Please be sure to get back to 0/0 values of antialiasing - we're still testing here. For testing purposes, we can also momentarily set the render cache creation shade rate values to -2/-2 - that's because we already know that at 0/0 quality is ok, but what we're trying to tweak now is the skylight-generated lighting.
Hit render:
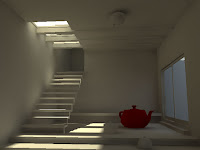 Hm, not that much skylight-generated illumination, ain't it? Maybe it needs some help.
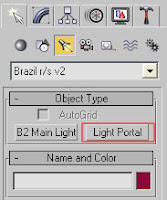
In the creation panel, start creating portals - they will help the skylight, "pulling" the light inside. I created one right behind every opening in the building, for a total of 4 light portals.
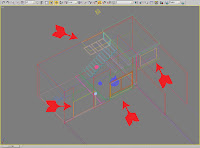
Notice that more portals doesn't mean more light - those are not area lights. The intensity of skylight will be the same - those are just "portals" for the skylight. If you want to change the skylight intensity, you have to tweak it on the luma server.Hit render again:
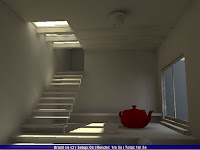
Ok, near the end. Now, just increase the qmc bounces to 5 and the portal samples to 25:
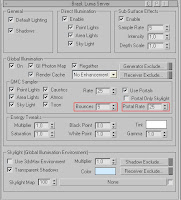 This will add a little bit more, indirect-lighting generated detail.
Time for the final rendering.
Settings that need to be changed:
- Antialiasing to 1/2 (Image sampling panel)
- Render Cache Creation Shade Rate to 0/0
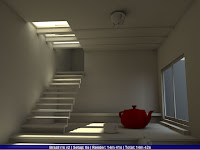 I think is a good result: quality is there, while keeping render time low.
Bonus step: Speed over quality
I'll just do this little step in speed direction, if you want to sacrifice some detail (useful for super fast and neat walkthroughs, for example).
Just take your Render Cache Creation Shade Rate to -2/-2. This will waste a few detail, but will speed up a lot the render cache map creation. To get some detail back, we can enable Retrace (under render cache panel - enhancements), retrace samples:18.
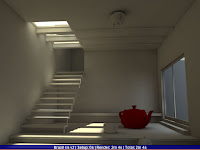 Notice the render time.
Well, that's all. Hope you enjoyed this little tutorial!

