Command Panel
The Command Panel in 3ds Max contains several user-interface panels that give you access to most of the modeling features of 3ds Max, as well as some animation features, display choices, and miscellaneous utilities. This is where you create and modify Brazil specific objects, cameras, and lights.At this point in the training material we're just concerned with quickly familiarizing ourselves with where these new objects are located in the user interface. We will get into details on creating, modifying, and rendering with all these new tools in future lessons.
Create Panel: The Brazil2 Primitives
- Click the Create Tab in the Command Panel
- If it's not already selected, click the Geometry Button
- In the dropdown list, select "Brazil2 Primitives"
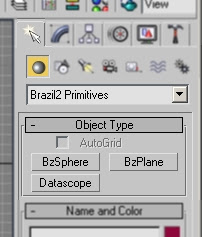
These are the Brazil specific objects that are installed with Brazil r/s. For now we'll just do a quick overview of what these objects are:
BzSphere is a mathematically defined, mathematically perfect sphere object that, when rendered with Brazil, isn't made of vertexes and faces, like normal 3ds Max geometry. When this sphere is rendered, it takes very little memory and will never have visible vertexes or geometric edges, no matter how close the camera approaches it.
BzPlane is a mathematically defined flat plane. It can be bounded so that it has a specific size or it can be rendered as an "infinite plane" that will extend all the way out to your scene's horizon. This object also has none of the typical 3ds Max face/vertex construction -- it's just a mathematical surface.
Note: BzPlane replaces the CSG plane that was available via the render dialog in Brazil 1. BzPlane is more versitile in that it can be bounded, you can create several of them if you wish, and you can orient/align the plane any way you wish
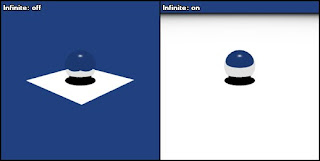
BzPlane as an infinite plane
Both BzSphere and BzPlane have built-in support for displacements. Displacement mapping is a technique that can by used to modify the shape, or geometry, of the surface of an object using textures or bitmaps.
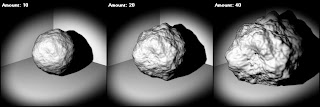
Displaced BzSphere
Datascope is an analysis/setup tool that we will be using when we get to a future section on lighting with photons.
Create Panel: The Brazil2 Lights
- In the Create Panel ("Create Panel" is what we call the Command Panel when the Create Tab is Selected), click the Lights button
- In the dropdown list, select "Brazil r/s V2"
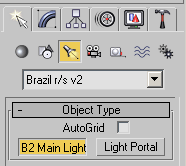
These buttons will allow you to create Brazil specific lights and set up Light Portals (We will deal with light portals when we get to rendering optimizations).
The B2Main Light is actually several different light types all built into a single, modular object. If you're familiar with 3ds max, then you know that Max has several different light types to choose from: Target Spot, Free Spot, etc. Using the B2Main Light you can create all those lights by just using different Creation Methods. We will cover creation methods and other features in a future section. For now, our goal is just to show you where these things are found.
Tip: By "Creation Methods", we are referring to how you use the mouse when you create the light. Do you just click? click-drag? double-click? etc. Different Creation Method sequences will create different types of B2Main Lights.

Just a few examples of Brazil2 Light types
Create Panel: The Brazil2 Camera
- In the Create Panel, click the Cameras Button.
- In the dropdown list, select "Brazil r/s V2".
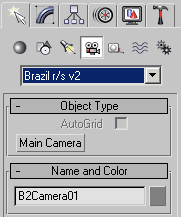
This Button creates the Brazil Main Camera. The type of camera you create (Free or Target) is also controlled here by Creation Methods, rather than multiple button choices. The Main Camera is where you set up camera specific Brazil r/s features, like lenses and Depth of Field.
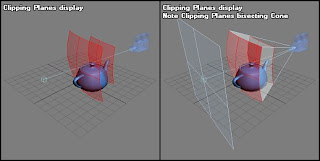
The Brazil Main Camera in the 3ds max UI
Modify Panel: The Brazil2 Modifier
To find the Brazil2 Modifier, you need to have some selected geometry in your scene, so lets do a quick step by step so that we can see where to find this modifier:
- In the Create Panel, click the Geometry Button.
- In the dropdown list, select Standard Primitives.
- click GeoSphere -- the button will turn yellow
- In the perspective viewport, click the center of the viewport and drag out your Geosphere.
- Go Back to the Command Panel, and click the Modify Tab (aka the "Modifier Panel")
- Click the Modifier List dropdown, and select "Brazil2 Displacement" under the OBJECT-SPACE MODIFIERS section.
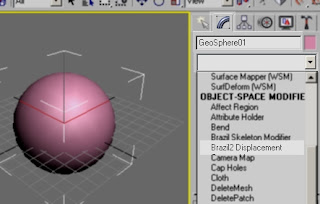
This is the Brazil 2 Displacement Modifier. You will use this when we get to applying displacements to arbitrary mesh-based geometry.

