Some time ago, since i was learning how to use Brazil 2.0 and discovering the differences with Brazil 1.x, i had a look at this tutorial (by Cecofuli - www.treddi.com, in italian). The scene is well known (i'm sorry but i couldn't find the original author), and i thought it was a good test for experimenting with B2.
I wanted to reach a result like this (rendered in Maxwell):
(image by Cecofuli - www.treddi.com)
Ok, let's start with the basic scene.
(3dsmax 9.0, 32 bit. If you haven't 3dsmax 9.0 i uploaded the .obj version of the scene)
Please, note that, since i don't own Maxwell, i had to rebuild the scene from the .obj file version of the scene (using the geometric "dummies" placed at the sun and camera places to recreate them in B2 format). So things aren't perfectly the same...
Units are in centimeters. Please adopt the file unit, to follow precisely the tutorial.As you can see opening the file, i kept things simple. A very basic material for the walls (B2 advanced material, diffuse color 245/245/245) and a red one for the big teapot (B2 advanced material, diffuse color 174/0/0).
Let's start analyzing the original rendering. First thing i wanted to replicate was the "sun" color and the skylight color.
Using Photoshop's eyedropper i picked up a few sample colors, and in the end I decided to go for 240/230/180 for the "sun" light color, and 80/90/170 for the skylight (we'll talk about the skylight in a bit, now just remember the rgb value).
So, let's do the basic setup for the "sun" (in the scene, "b2 main light 01").
To simulate the original lighting I did those steps:
- changed the light color to the "sun" rgb value i decided before.
- turned on "shadow" under the light features panel, and switched the shadow type from "Integrated Ray Shadows" to "Brazil2 Ray Shadows".
- Turned on Decay, "Inverse square", Scale 1,0. Boosted the multiplier up to 500.000.
- under the "Brazil2 Ray Shadows" panel, i picked up the "Sphere Area" mode, 20 Cm diameter.
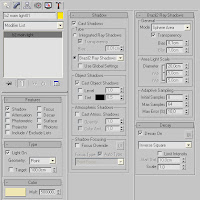 Note that i've used "sphere area" shadow type because, in the .obj scene, the sun was a low-poly sphere of 20 cm diameter. This because, as far as I've understood from the italian Cecofuli's tutorial, Maxwell uses self-emitting geometry as light sources.
I could've tried to emulate this behaviour with B2 - for example, using self-emitting material on a sphere and cranking up the qmc bounces and samples - but this was not my purpose.
My purpose was to reach the same original image quality/aspect, using all the B2 features needed to reach the goal, with the lowest render time possible.
Ok, let's hit "Render".
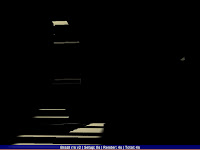 Nothing more then expected. There is no GI-light bouncing at this stage, so the output is almost all black, except where the light hits directly.
You can see that edges are jagged: don't worry about it, it's just the AA sampler's default value (0/0). Let's keep it this way for a few: experimenting will be much faster, while keeping a good approximation of the final look.
Now, the first GI test. Just turn on "Global Illumination":
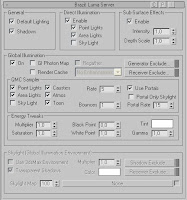 Here's the result. Render time bumped up, but light starts bouncing...
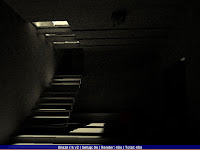 Ok, we need more light in there. First thing I do at this step is start up playing with photons. Just activate them in the light, under the "features" panel, and check "GI Photon Map" in the luma server rollout. Hit render again:
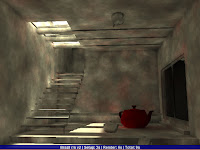 Much better. Light quantity is a lot more, even if the walls look like camouflage...
Since we're aiming for a detailed rendering, let's fine-tune the photon map.
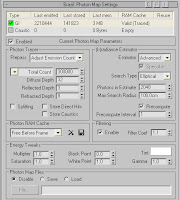
I changed the Total count of photons up to 300.000, Search type to elliptical (slower, but better on corners), Photons in estimate to 2048, Precompute to 1. I also turned on the Filtering, to smooth out the photon map. Notice that a precompute value of 1 is very low if you plan to use regathering (and I do, for this rendering) - but, again, quality first. We could tweak it in a second time.
Settings for the photon map are kinda cranked up, but since the scene is relatively "easy" (just one light emitting photons, simple geometry) and since my goal was quality, i think is ok.
By the way, the calc time for the photon map was quite acceptable, and the result very smooth and detailed - for a photon solution that will be regathered, of course.
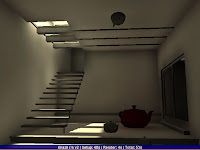 Ok, that's all for the first part. In the second part we'll add the skylight with the help of skylight Portals, and we'll complete the rendering with regathering and render cache. Stay tuned!

