Hi all.
In this very simple tutorial we'll use the Brazil2 Utility Material to make White cards for true, HDRI-like reflected highlights.
Download the scene here (Max 9.0 32bit)
It's a simple scene: The scene is ready to be rendered. Hit render and see what comes out:
 I used three kind of materials here: a simple white-ish for the walls, B2 Car Paint with reflection at 100% for the hoses and the lumpy torus knot, and black and white "glazed pottery"-like materials (with settings based on this Neil Blevins tutorial - if you know what's good for you, better you read all his cg education section!) for the teapots and the other two black and white thingies there.
Notice that Car Paint material (Brazil 2 Advanced material - Base shader - Car Paint) got fresnel reflections by default.The other reflective materials use a fresnel falloff map in the reflection slot, with IOR turned up to 2.5.
Ok, let's have a look at the rendering: I disabled the "specular" part of the area light, so the highlights will be generated only by raytraced reflections. The light intensity would suggest some stronger highlights there...
I placed a thin box with width and height based on the area light size, right behind the light (named "whitecard"). Open the material editor and locate the "Whitecard_1" material - that's the material i applied on the whitecard. A diffuse white color, nothing else.
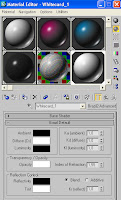 Just turn "Luminosity" to pure white, and render again:
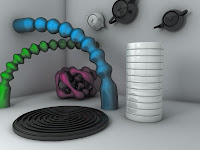
Better, but highlights are still not that strong - even if luminosity has been boosted up to it's maximum value. Why the highlights aren't that strong then? Well, in real life there's no 255/255/255 limit... so, the diffuse part of the materials will always subtract a few brightness from the reflection. Only a Chrome material would keep the white card brightness - but a Chrome material doesn't have a diffuse component. So, a simple workaround would be raising the Kl index to boost up the luminosity, over the RGB values limit:
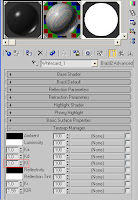
Note that there are a bunch of ways to increase the output value of a material, to let it be "brighter" then pure RGB white value - this is just one of them.Try to raise the Kl value to 10 and render again:
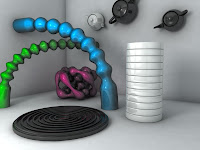 Ooops. Highlights are there, nice and strong enough, but the scene is much more lit and some noise appeared on the walls. Why?
Well, objects with self-emitting materials will generate, by default, GI (if GI is on, obviously). This could be annoying, because a) white cards will modify the lighting setup you had decided for, and b) to remove the noise, you'll have to tweak a few settings that will probably slow down the rendering, like increasing the QMC value.
There's a quick and simple workaround: wrap the whitecard's material in a Brazil2 Utility Material, and set the latter to inhibit the material from emitting indirect GI lighting.
Just click on the "Brazil2 Advanced" labeled button. The Material/Map Browser will pop up. Double click on "Brazil2 Utility Material", and when asked choose "keep old material as sub-material".
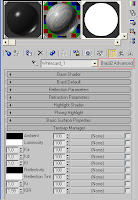 Our Whitecard_1 material has been put on the "Base" slot of the B2 utility material. Ok, a few more steps and we'll be done:
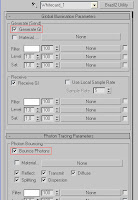 Just disable the "Generate GI" and "Bounce Photons" slots, and render the scene again:
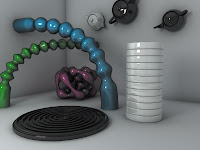
Ok, now we're back at the original lighting setup (very first rendering), but now we got our highlights!
Ok, let's see another situation: keeping the highlights without the "pure white" aspect of the white card object. Download another version of the scene, Whitecards_neons.zip.
Hit render. Here's the result:
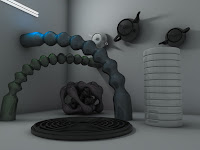 Ok, my goal here is to keep the "neons" look - bright, but not pure white, so they can have some reflection on them - while having strong highlights on the objects. Just boosting up the Kl spinner wouldn't help us - the neons would become totally white.
So, that's how I do in those situations: just wrap the "Neons" material in a B2 Utility Material. Then, as before, disable GI emission and Photon bouncing to avoid noise and unwanted lighting changes.
For the highlights, this time we'll use the Utility Material "Reflected" slot.
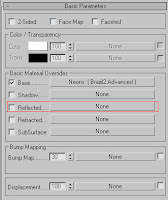 The idea is simple and powerful: the material that will be placed on that slot will be the one "seen" by the reflections.
So, let's proceed this way: copy (not instance, copy!) the Neon material from the "Base" to the "Reflected" slot. Then, raise up to 10 the Kl of the new, copied material. You're done!
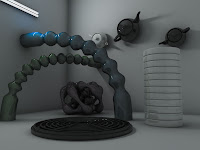
Have a look at the "walls" material too. I used the B2 Utility Material to increase the QMC samples received by the walls (to smooth and improve the aspect of the bounced light - for example the one from the blue hose - without sacrificing the render time). Another use for the Utility Material... now, that's why it's been called like that!

