This simple tutorial will show you one of the ways to control what is reflected in your scene. Download the file field-guide_reflection_tut.zip. Open the max file. We see a simple building and some kind of public art teapot sculpture. Render the camera view.
The windows are a Brazil 2 Chrome material and we can see they are reflecting the ground plane and a white environment. (Check out the Infinite Ground Plane tutorial for info on how to set up the ground.)
Let’s put a photo of some clouds in the background. Press 8 to bring up the Environment and Effects dialog. Load sky.png into the Environment Map slot. Open the Material Editor and drag the environment map into an empty slot.
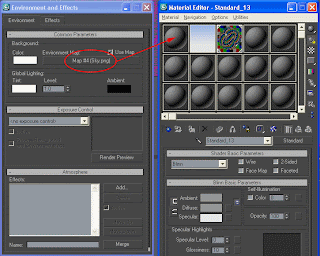 Choose Instance on the dialog box that pops up when you release the mouse. Change the Mapping Coordinates to Cylindrical Environment.
 Render again and you get this:
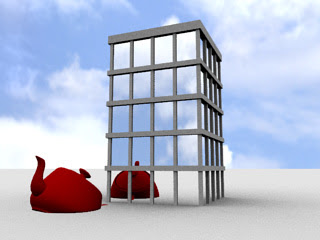
Now let’s change the background but keep the clouds reflected in the windows. Open the Environment dialog again. From the Material Editor, drag the blue gradient onto the Environment Map button and choose Instance. Render again.
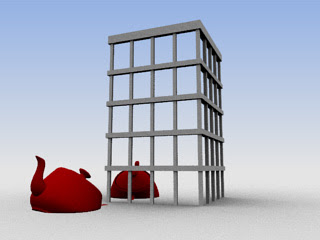
The clouds aren’t in the windows anymore but we’ll fix that now. Select the Chrome material in the Material Editor and go to the Chrome Parameters rollout.
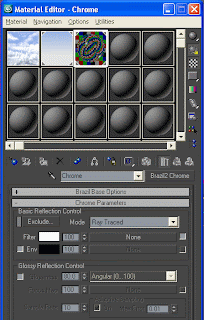
Click the checkbox next to Env to activate Environment mapping. Drag the clouds bitmap into the Environment map button. Now the chrome material will reflect the cloud graphic. Render again.
Lookin’ good! But what if you don’t want to see the giant red teapot reflected in the windows? Select the teapot, right-click in the viewport and click on Object Properties.
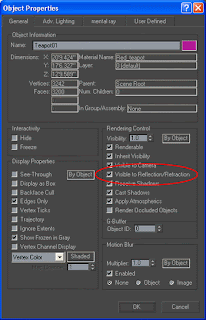
Uncheck Visible to Reflection/Refraction, click OK and render again.
This is just one of several ways to control what is reflected in your materials. The Environment map controls that we used in this tutorial aren't limited to the Chrome material. The Brazil 2 Advanced material and Glass material also have these controls.


